
 By gail
Choosing the right under cabinet lighting transforms task visibility, energy efficiency, and the overall functionality of your commercial kitchen, retail display, or industrial workspace. Three primary types dominate the market: LED strips and puck lights for flexibility and efficiency, fluorescent tubes for broad coverage in budget-conscious installations, and xenon or halogen options where color rendering is critical. For facilities managers evaluating these systems in 2026, LED technology delivers the strongest return on investment through lower energy consumption, minimal heat output, and installation versatility that adapts to both hardwired and plug-in scenarios.
Understanding your lighting requirements starts with application specifics. Food preparation areas demand bright, shadow-free illumination that meets health code standards. Retail displays need precise color temperature to showcase products authentically. Warehouse and logistics spaces benefit from durable, low-maintenance solutions that reduce operational downtime. Solar-powered under cabinet systems are gaining traction in remote facilities, mobile units, and off-grid applications where traditional electrical infrastructure is impractical or cost-prohibitive.
The installation complexity varies significantly across types. Plug-in LED systems can be operational within an hour with basic tools and no electrical expertise. Hardwired fluorescent fixtures require professional-grade installation but integrate cleanly into existing electrical systems. This guide walks through each lighting type’s technical specifications, real-world performance characteristics, and complete installation procedures. You’ll learn which tools are essential, what safety protocols prevent common installation hazards, and how to verify your system delivers optimal light levels for your specific environment.
Understanding Under Cabinet Lighting Types
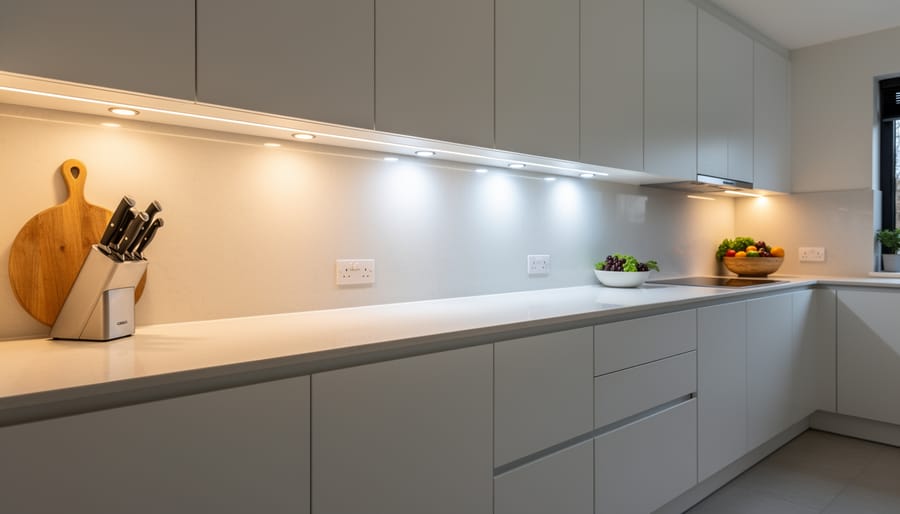
Under cabinet lighting comes in four distinct types, each engineered for specific performance requirements and installation scenarios. Understanding their construction and light distribution patterns helps you match the right solution to your application.
LED Puck Lights
Puck lights are compact, disc-shaped fixtures typically measuring two to four inches in diameter. They house multiple LED diodes arranged in a circular pattern, creating focused pools of light directly beneath each unit. This concentrated output makes them ideal for highlighting specific work zones or display items rather than providing continuous illumination. Commercial kitchens often deploy puck lights above prep stations where task-specific brightness matters more than uniform coverage. The discrete form factor suits installations where cabinet depth is limited or where you need to avoid interference with items stored at the cabinet’s front edge. Most puck lights operate on low-voltage systems (12V or 24V), though line-voltage (120V) versions exist for hardwired applications.
LED Strip Lights
Strip lights consist of multiple LED chips mounted on a flexible circuit board, delivering continuous linear illumination across the entire cabinet length. This design eliminates dark spots between fixtures and provides the most uniform light distribution of any under cabinet type. The flexibility allows routing around corners and obstacles, while various densities (measured in LEDs per foot) let you calibrate brightness to match task requirements. Strip configurations range from basic single-color white to RGB and tunable white systems that adjust color temperature throughout the day. The LED strip benefits include minimal heat generation, exceptional longevity, and the ability to cut strips to precise lengths at designated cutting points. These characteristics make strips the preferred choice for commercial installations requiring consistent energy-efficient lighting across extended runs.
LED Bar Lights
Bar lights are rigid fixtures with LED arrays enclosed in aluminum or plastic housings. They function similarly to strips but offer a more finished appearance and built-in diffusers that soften light output and reduce glare. Bars range from six inches to four feet in length, with longer units providing better coverage for standard cabinet widths. The rigid construction simplifies installation compared to flexible strips, as bars mount with just two or three attachment points rather than requiring support along the entire length. Linkable bar systems allow you to connect multiple units end-to-end, creating continuous runs while maintaining the structural advantages of rigid fixtures.
Rope Lights
Rope lights encapsulate LED diodes within a flexible plastic tube, creating a weatherproof, impact-resistant lighting solution. While they deliver softer, more diffused light than other types, their durability suits harsh environments including outdoor applications, industrial settings, and areas exposed to moisture or physical contact. The cylindrical shape produces omnidirectional light distribution, which reduces efficiency for task lighting but works well for ambient or accent applications.
Power Source Considerations
All four types are available in plug-in, hardwired, and battery-powered configurations. Plug-in models offer the simplest installation but require accessible outlets. Hardwired systems provide the cleanest appearance and unlimited runtime but demand electrical expertise or professional installation. For remote facilities, outdoor structures, or locations where grid power is unavailable or cost-prohibitive, solar-powered systems paired with battery storage deliver reliable operation without ongoing electrical costs. Solar configurations work with any lighting type, though the lower power consumption of strips and bars makes them easier to support with modestly-sized solar arrays.
Tools and Materials You’ll Need
Before you begin any under cabinet lighting installation, assembling the right tools and materials prevents mid-project delays and ensures a professional result. Your specific requirements depend on the lighting type you’ve chosen and whether you’re installing a hardwired, plug-in, or solar-powered system.
Universal Tools and Materials
Regardless of your lighting choice, you’ll need a tape measure for accurate spacing calculations, a level to ensure straight alignment, and a pencil for marking mounting locations. A stud finder helps locate secure mounting points in cabinets, while a drill with appropriate bits handles any necessary pilot holes. Wire strippers and cutters are essential for preparing connections, even on low-voltage systems. Keep a voltage tester or multimeter on hand to verify circuits are de-energized before starting work.
Installation-Specific Requirements
- Plug-in systems: Extension cords (if needed), cable clips for routing wires, and adhesive cable channels to hide cords along cabinet undersides
- Hardwired installations: Wire nuts, electrical tape, junction boxes, appropriate gauge wire (typically 14/2 or 12/2 for 120V circuits), wire connectors, and a circuit breaker or switch
- Low-voltage LED strips: DC power supply or transformer rated for your total wattage, connectors compatible with your strip type, and potentially aluminum channels for heat dissipation
- Solar-powered systems: Solar panels sized for your lighting load, charge controller to prevent battery overcharging, deep-cycle batteries with adequate amp-hour capacity, mounting brackets for panels, and weatherproof wiring rated for outdoor use
For mounting, gather the hardware included with your fixtures, typically adhesive strips for lightweight puck lights, mounting clips for LED strips, or screws and anchors for heavier bar lights. Cabinet material matters: wood accepts screws directly, while metal or glass surfaces may require specialized adhesive or magnetic mounts.
Stock spare connectors and a few extra wire nuts. Having backup materials means you won’t halt installation if a connector fails or measurements require adjustment.
Safety Considerations and Pre-Installation Checks
Before you mount a single fixture or connect any wires, take time to assess electrical safety and environmental conditions. Skipping this step can lead to shock hazards, fire risks, or equipment failure.
Start by verifying your power source. For hardwired line-voltage installations (120V), always turn off power at the circuit breaker and confirm the circuit is dead using a non-contact voltage tester before touching any wires. Low-voltage systems (12V or 24V) reduce shock risk substantially but still require proper handling of transformers and power supplies. If your installation involves modifying existing electrical circuits, running new wiring through walls, or you’re uncertain about your home’s electrical configuration, stop and consult a licensed electrician.
Cabinet material matters for both mounting stability and heat management. Solid wood and plywood accept screws reliably, while particleboard or laminate may require specialized anchors or adhesive mounting. Check that your chosen fixtures won’t trap heat against cabinet bottoms, LED lights produce minimal heat compared to older technologies, but adequate ventilation prevents premature failure and maintains safe operating temperatures.
For solar-powered systems, inspect panel placement options before committing to a layout. Panels need unobstructed southern exposure (northern hemisphere) and secure mounting away from potential impact or weather damage. Verify that battery storage locations remain dry and within manufacturer-specified temperature ranges. Handle lithium batteries carefully and follow charging specifications to prevent thermal runaway.
Examine your planned installation area for obstructions like cabinet hardware, molding, or existing wiring that could interfere with placement. This preparation stage connects directly to effective light layering strategy, you’re ensuring the foundational task layer installs safely before considering ambient or accent layers. Measure twice, noting any irregularities or challenges that might require workarounds during the actual installation process.
Step-by-Step Installation Process
Planning Layout and Placement
Before mounting any fixtures, map out your installation zone with precision. Use a tape measure to record the full length of each cabinet run where you’ll install lighting. Mark the front and rear edges of the underside, most cabinets measure 12 to 14 inches deep, and your fixture placement affects coverage dramatically.
For even illumination, position lights 2 to 4 inches from the front cabinet edge. Mounting too far back creates shadows on the countertop; too far forward exposes harsh glare. If you’re installing strip or bar lights, plan continuous runs that span the cabinet length minus 2 inches on each end for clearance. Puck lights require spacing calculations: divide cabinet length by the number of fixtures, then subtract fixture diameter to determine gap spacing between each unit.
Check for obstructions now, not mid-installation. Open cabinet doors and look for hinges, mounting brackets, and existing electrical boxes that could block fixture placement. Note the locations of outlets, switches, and stud positions if you’re routing wires through walls.
For traditional wired systems, sketch your power path from the nearest outlet or junction box to each fixture location, minimizing visible wire runs. If implementing solar power in remote applications, similar to planning outdoor smart bulbs for off-grid spaces, identify where panels will mount with unobstructed sun exposure and where battery storage can sit within 10 feet of the fixtures. Document these measurements; they’ll guide your material purchases and prevent costly mistakes.
Mounting the Fixtures
Securing fixtures properly prevents sagging, shifting, and premature failure. The mounting method depends on both the lighting type and the cabinet material you’re working with.
Adhesive Strip Installation
Most LED strip lights and some puck lights come with pre-applied 3M adhesive backing. Before peeling the protective film, clean the cabinet surface thoroughly with isopropyl alcohol and let it dry completely, any dust, grease, or moisture will compromise adhesion. Press the strip firmly along its entire length, applying sustained pressure for 10-15 seconds. For longer strips over two feet, add supplementary mounting clips every 12 inches to prevent eventual drooping from heat or gravity.
Clip and Bracket Mounting
LED bar lights typically use plastic or metal clips that snap into place. Position clips at the manufacturer’s recommended intervals (usually every 18-24 inches), mark holes with a pencil, then secure with provided screws. For particleboard or laminate cabinets, pre-drill pilot holes slightly smaller than the screw diameter to prevent splitting.
Screw Mounting for Permanent Installations
Puck lights and hardwired fixtures often require direct screw mounting. Use #6 or #8 screws appropriate for your cabinet thickness, typically ½-inch for most applications. Space puck lights 12-18 inches apart for even coverage, marking centers with a level to ensure alignment. For glass or metal cabinets, use specialized drill bits and anchors designed for those materials to avoid cracking or slipping.
Check that all fixtures sit flush against the surface before final tightening.
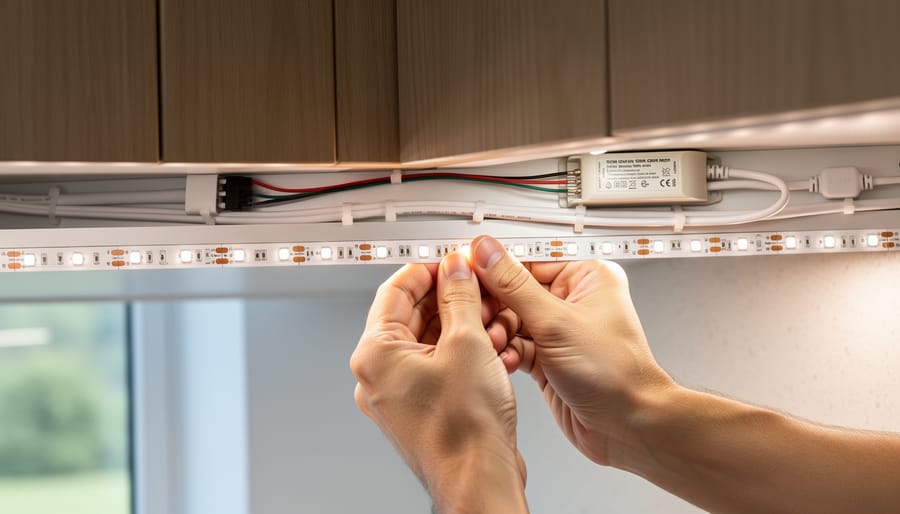
Connecting Power Sources
Once your fixtures are mounted, connecting power correctly ensures safe operation and optimal performance. The method depends on your chosen power source and lighting type.
Plug-In Installations
Plug-in under cabinet lights are the simplest to connect. Route the power cord from the first fixture along the cabinet bottom toward the nearest outlet, using cable clips every 12-18 inches to secure it discreetly. If your system includes multiple fixtures, daisy-chain them using the manufacturer’s linking cables, these typically snap or twist-lock between units. Verify that the total wattage of all connected fixtures does not exceed the circuit capacity, usually 15 amps for standard household outlets.
Low-Voltage Systems
LED strip lights and some bar lights run on 12V or 24V DC power through a transformer. Mount the transformer near an outlet in an accessible location with adequate ventilation, inside a cabinet is acceptable if the manufacturer specifies it. Connect the transformer output wires to your lighting strip, matching positive to positive and negative to negative. Most systems use color-coded wires: red for positive, black for negative. Reversing polarity won’t damage LEDs but will prevent them from lighting. Use wire nuts or push connectors for secure connections, then wrap with electrical tape.
Hardwired Installations
Turn off power at the circuit breaker before starting. Connect the fixture wires to your home’s electrical system inside an approved junction box, typically white to neutral, black to hot, and green or bare copper to ground. Use wire nuts rated for the wire gauge and number of conductors. If installing multiple fixtures on one circuit, create a continuous run by connecting output wires from one fixture to input wires of the next. Tuck connections neatly into the junction box before securing the cover plate.
Solar Power Connections
Connect your solar panel output to the charge controller, then wire the controller to your battery bank following the polarity markings. Finally, run low-voltage wires from the battery to your lighting fixtures. Use outdoor-rated connectors and seal all exterior connections with silicone or heat-shrink tubing to prevent moisture intrusion.
Solar-Powered Under Cabinet Solutions for Remote Applications
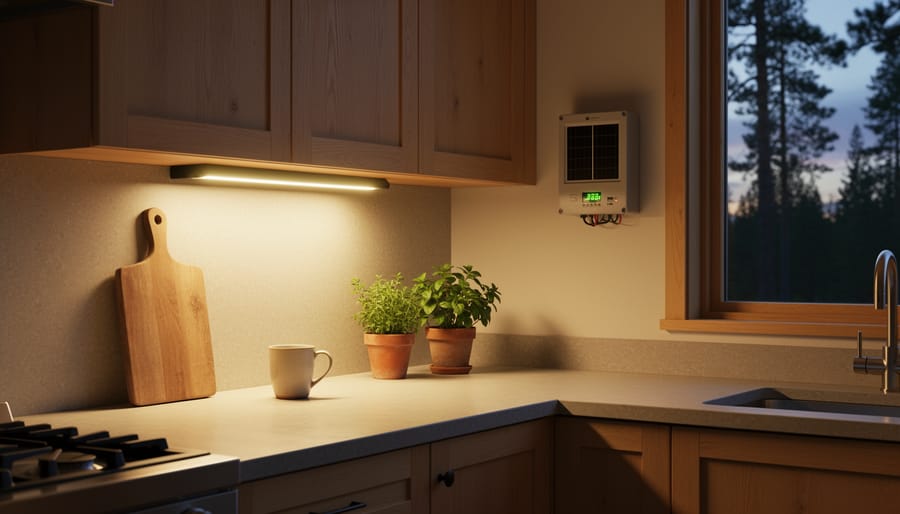
Solar-powered under cabinet lighting transforms spaces where grid power is impractical or prohibitively expensive. Outdoor kitchens, workshop sheds, cabins without electrical service, and facilities in remote locations now have viable illumination options that eliminate trenching costs and ongoing utility bills.
The core components of a solar under cabinet system include photovoltaic panels, a charge controller, battery storage, and low-voltage LED fixtures. System sizing depends on your lighting needs: a typical 12-volt LED strip drawing 4 watts per foot requires roughly 20-30 watts of daily energy for three hours of evening use. Factor in at least 20% capacity overhead to account for cloudy days and battery aging. A 50-watt solar panel paired with a 20-amp-hour deep-cycle battery handles most single-cabinet installations.
Panel placement requires southern exposure with minimal shade obstruction. Mount panels within 15 feet of the cabinet location to minimize voltage drop through the connecting cable, use 14-gauge wire or heavier for runs exceeding 10 feet. Weatherproof charge controllers rated for your system voltage (12V or 24V) prevent battery overcharging and extend component life. Position the controller and battery in a ventilated enclosure protected from temperature extremes; batteries perform poorly below freezing.
LED strip lights work best for solar applications due to their low power draw and flexibility. Calculate total wattage, then size your battery to provide at least two nights of operation without recharging. This buffer ensures consistent lighting during consecutive overcast days. A 30-watt system typically needs a 40-50 amp-hour battery bank.
Maintenance is minimal but essential. Clean solar panels quarterly to maintain charging efficiency, dust and pollen reduce output by 15-25%. Check battery terminals for corrosion every six months and verify voltage levels with a multimeter. Replace batteries every 3-5 years depending on discharge cycles. Inspect all wiring connections annually, especially in outdoor installations where moisture and temperature swings stress components.
Remote monitoring systems add convenience for facilities managers overseeing multiple solar installations. Bluetooth-enabled charge controllers send battery status and solar input data to smartphones, allowing you to track performance without site visits. This innovation supports proactive maintenance and identifies underperforming panels before lighting quality degrades.
Testing, Verification, and Troubleshooting
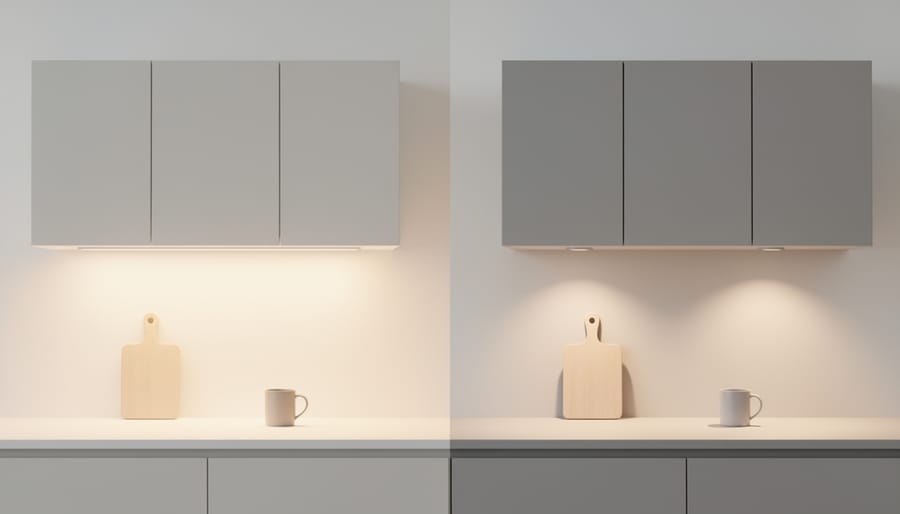
After completing your installation, run through a systematic verification process before considering the job finished. Turn on all lights and observe each fixture individually. Check that every section illuminates at the expected brightness level, dim spots or dark zones indicate a connection problem or inadequate power supply. Stand back and look at the entire installation from normal viewing angles to assess coverage uniformity. Light should spread evenly across the counter without harsh shadows or glaring hot spots.
For hardwired systems, verify that switches operate correctly and that dimmer controls (if installed) adjust brightness smoothly across the full range. With plug-in setups, confirm the adapter fits securely in the outlet and cables are properly routed without creating trip hazards. Low-voltage systems require checking transformer output with a multimeter to ensure it matches the fixture requirements, typically 12V or 24V DC. Solar installations need special attention: confirm panels receive direct sunlight during peak hours, check that charge controllers show active charging (usually indicated by LED status lights), and verify battery storage maintains charge overnight.
- Flickering lights: check all connection points for loose wires or poor contact; with LED strips, verify polarity matches correctly.
- Uneven brightness: ensure transformer capacity isn’t exceeded; inspect each connector along strip runs for secure attachment.
- Partial sections not lighting: look for damaged strips or broken solder points; replace affected segments.
- Solar system not charging: clean panel surface, adjust angle for better sun exposure, test charge controller connections.
- Lights dim after hours of operation: indicates insufficient battery capacity or undersized solar panel, upgrade storage or add panel area.
If problems persist after basic troubleshooting, isolate the issue by testing one fixture at a time. Swap components between working and non-working sections to identify whether the fixture itself or the power connection is faulty. For safety, always turn off power at the breaker before inspecting hardwired connections.
Next Steps: Maintenance and Optimization
After installation and testing, your under cabinet lighting system requires minimal but consistent attention to maintain peak performance. Set a quarterly maintenance schedule: wipe fixtures with a soft, dry cloth to remove dust and cooking residue that can reduce light output by up to 30 percent, and inspect all connections for looseness or corrosion. For solar-powered systems, clean the solar panels monthly and verify that battery voltage readings remain within the manufacturer’s specified range, typically 12V to 13.8V for fully charged systems.
Check for signs that your lighting needs adjustment. If shadows appear in work areas or certain zones seem dim, reposition fixtures slightly or add supplemental units to problem spots. When your needs evolve, perhaps you’ve added new cabinetry or changed kitchen workflows, consider expanding your system with additional strips or pucks rather than replacing the entire installation.
Solar system optimization involves seasonal adjustments: reposition panels in winter if shade patterns change, and monitor performance during shorter daylight periods to ensure adequate charging. Replace batteries every three to five years, even if they appear functional, to prevent sudden failures.
Once your under cabinet lighting performs reliably, explore in-cabinet lighting ideas to create comprehensive illumination that highlights displays, improves visibility inside cabinets, and completes your layered lighting strategy. This approach transforms functional task lighting into an integrated system that serves both practical and aesthetic goals while maintaining the energy efficiency and sustainability that define modern commercial lighting practices.
Frequently Asked Questions
Installing under cabinet lighting raises practical questions about compatibility, complexity, and long-term viability. Here are answers to the most common concerns facility managers and business owners face when planning their cabinet lighting projects.
Can I install under cabinet lighting myself or do I need an electrician?
Plug-in and battery-powered options are straightforward DIY installations requiring only basic tools. Hardwired line-voltage installations that connect directly to your building’s electrical system require a licensed electrician to ensure code compliance and safety.
How much power do LED under cabinet lights consume?
LED under cabinet lights typically consume 3-12 watts per foot depending on brightness level, which translates to roughly $2-8 per year in electricity costs for a standard 6-foot installation running 8 hours daily. This represents an 80-90% reduction compared to older halogen or fluorescent options.
Are solar-powered under cabinet lights viable for commercial applications?
Solar under cabinet lighting works well for remote facilities, outdoor kitchens, storage buildings, and locations where extending electrical wiring is cost-prohibitive. The key is adequate solar panel placement with unobstructed sunlight exposure and properly sized battery storage to maintain illumination during cloudy periods.
Will adhesive mounting damage my cabinet finish?
High-quality 3M adhesive strips designed for cabinet lighting provide secure mounting without damaging finishes when removed properly. For antique, specialty, or delicate cabinet surfaces, opt for mounting clips or magnetic systems that avoid direct adhesive contact.
Compatibility concerns often center on cabinet construction. Standard plywood, MDF, and solid wood cabinets accept all mounting methods without issue. Metal cabinets work best with magnetic mounting systems or screw-mounted fixtures. Glass or open-frame cabinets require external mounting to adjacent walls or the underside of upper surfaces, with strip lights offering the most flexible routing options.
Color temperature selection matters more than many realize. Kitchens and food preparation areas benefit from 3000-4000K warm white that renders food colors naturally without the harsh cast of cool white. Work areas, inspection stations, and detail-oriented tasks perform better under 4000-5000K neutral white that reduces eye strain during extended use.
Dimming capability adds operational flexibility but requires compatible components throughout the system. Not all LED drivers support dimming, and mixing dimmable with non-dimmable fixtures on the same circuit creates uneven performance. When planning dimming functionality, specify dimmer-compatible transformers and verify compatibility between your wall dimmer switch and the LED driver technology.
The lifespan question comes up frequently. Quality LED under cabinet lights deliver 50,000 hours of operation, which translates to roughly 17 years of 8-hour daily use before reaching 70% of original brightness. Solar systems require battery replacement every 3-5 years depending on chemistry and depth of discharge, but the LED components maintain the same multi-decade lifespan.
Selecting and installing the right under cabinet lighting transforms both function and ambiance in any space. Throughout this guide, you’ve explored the four primary lighting types, puck lights for focused task illumination, strip lights for continuous coverage, bar lights for balanced distribution, and rope lights for accent work, each serving distinct needs based on your cabinet layout and usage requirements.
Your installation success hinges on three core decisions: choosing the appropriate lighting type for your coverage needs, selecting a power source that matches your infrastructure and budget, and following proper installation methods that ensure safety and longevity. For traditional settings with accessible electrical infrastructure, hardwired or plug-in LED options deliver reliable, high-output performance. In remote facilities, outdoor kitchens, cabins, or locations where grid power proves impractical or cost-prohibitive, solar-powered systems offer genuine operational advantages without sacrificing light quality.
The steps outlined here, from careful planning and measurement through methodical installation to systematic verification, apply whether you’re lighting a residential kitchen or equipping a remote commercial facility. Solar solutions particularly benefit operations seeking to reduce energy costs, minimize electrical infrastructure investment, or meet sustainability targets without compromising functionality.
Effective cabinet lighting extends beyond simple fixture installation. It represents a strategic approach to workspace optimization, combining energy efficiency with practical illumination that enhances safety and productivity. As lighting technology continues advancing, integrating sustainable power sources with proven installation techniques positions your facilities for long-term performance and operational flexibility.